Welcome back to our tutorial series on Sympathy for Data. In our previous session, we learned how to clean up data. Today, we'll walk you through the process of exporting data.
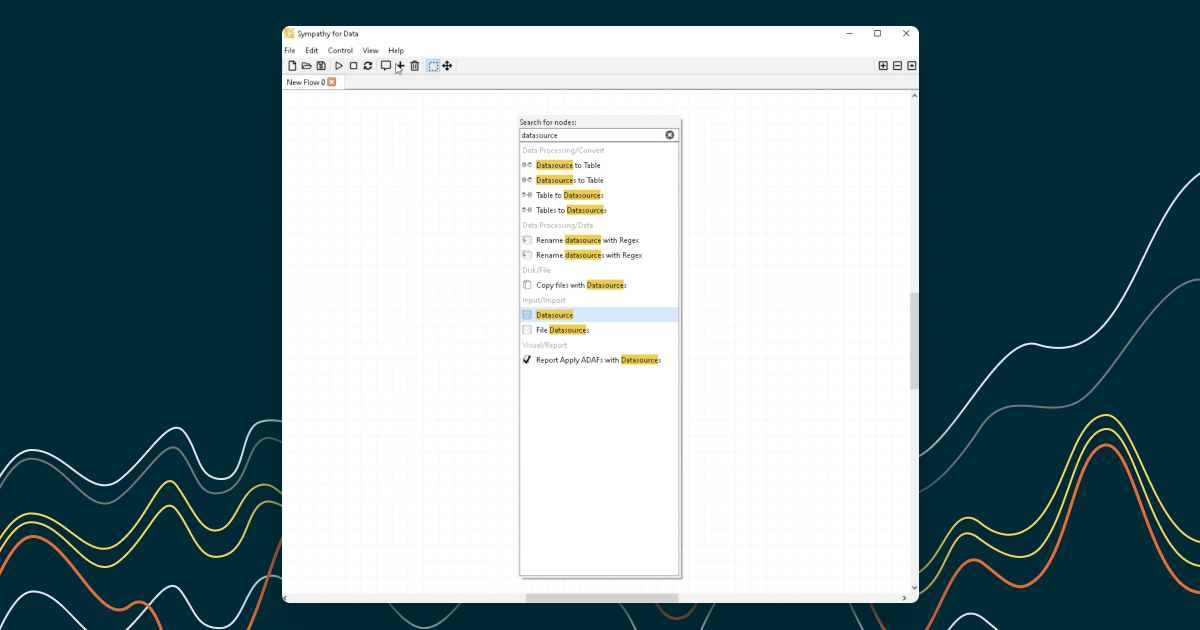
Step 1: Connecting a New Node
Start by dragging from the output port and dropping to initiate the connection of a new node. Choose "Item to List" as it is a type conversion needed for the next node.
Step 2: Executing the Node

Execute the node.
Step 3: Connecting Another New Node

Start connecting another new node. This time, choose "Export Tables".
Step 4: Configuring the New Node
Next, you need to configure this node. Click on the "..." button to browse for the output directory. Choose the "Data" directory.
Step 5: Setting the Filename

Enter "refined_cardata" as the filename.
Step 6: Saving and Executing

Press OK to save the node's configuration, then execute it. The file "refined_cardata.csv" will be exported to your chosen directory.
Step 7: Checking the Exported File
Let's make sure the file has been exported correctly. You can do this by importing it and checking the plot.
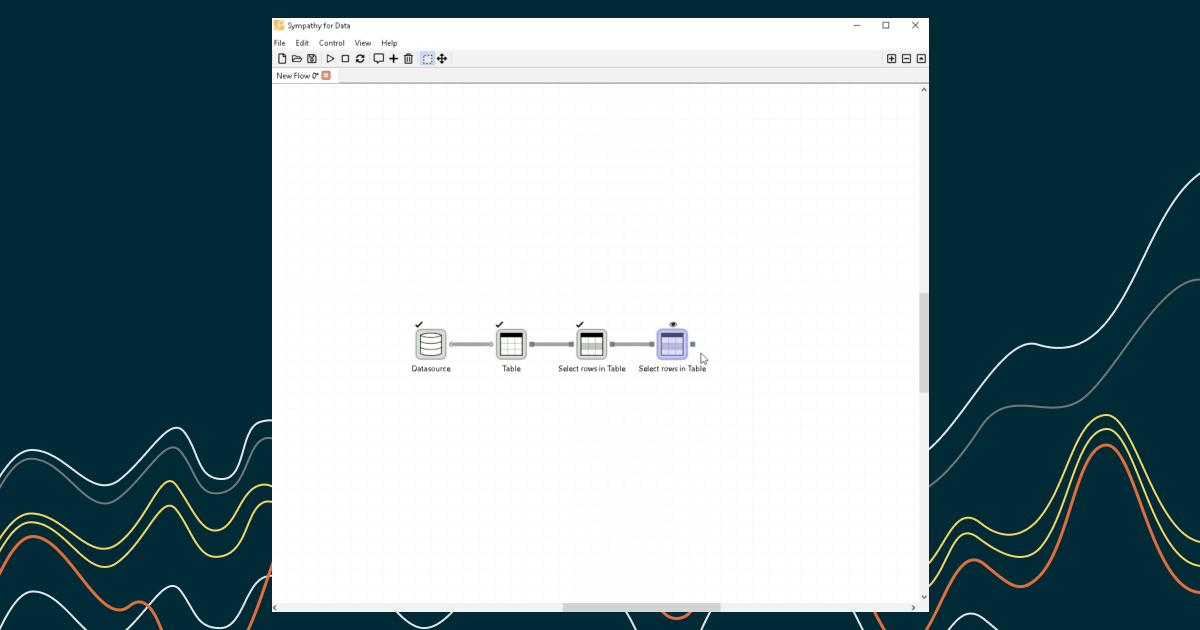
Step 8: Creating a Copy of Nodes

First, create a copy of the two first nodes. This can be done using keyboard shortcuts Ctrl+C and Ctrl+V.
Step 9: Configuring the New Datasource

Configure the new Datasource. Select the exported file "refined_cardata.csv".
Step 10: Executing the New Nodes
Execute the new nodes.
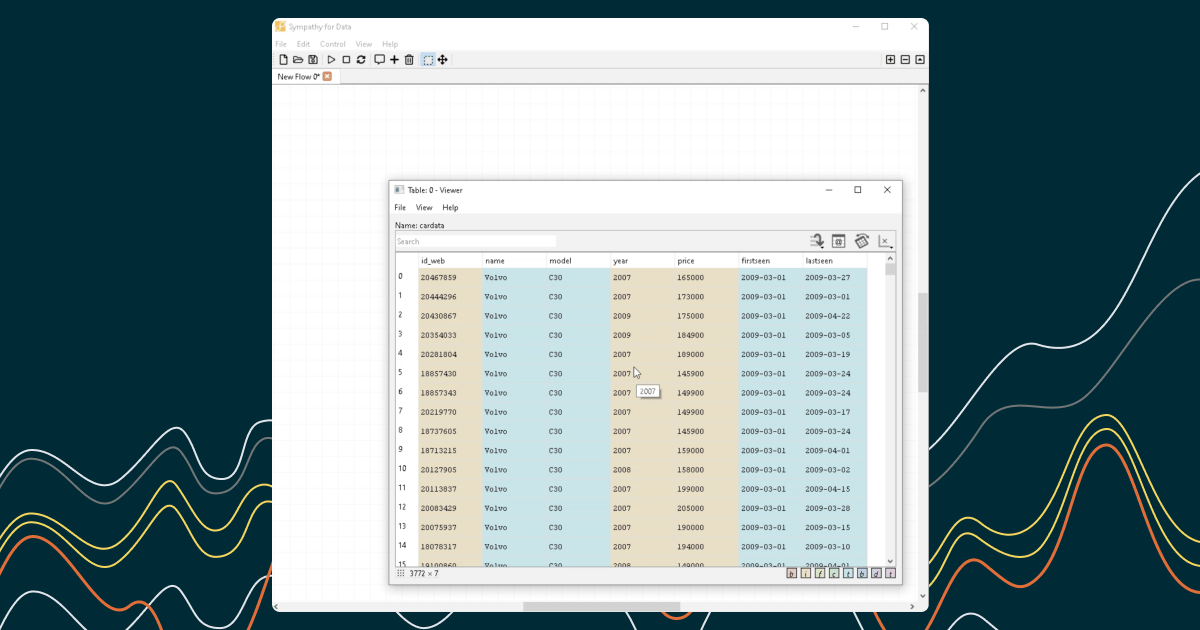
Step 11: Opening the Data Viewer
Double-click on the output port to bring up the data viewer.
Step 12: Exploring the Exported and Imported Data

Explore the data that you exported and then imported. Plot "year" on the x-axis and "price" on the y-axis. The plot should match the cleaned data, demonstrating that the data was exported correctly.
Close the viewer when you're done. Congratulations, now you know how to export data using Sympathy for Data!
Thanks for watching and stay tuned for more!